Raspberry Pi VPC IoT Tutorial: Your Ultimate Guide To Cloud-Based Projects
Building your own Raspberry Pi VPC IoT setup doesn’t have to be rocket science. Imagine turning your tiny Raspberry Pi into a powerful cloud-connected device that automates your home, monitors data, or even powers an entire smart city project. Sounds cool, right? Well, buckle up because this tutorial will take you on a journey from zero to hero in the world of IoT using Raspberry Pi and VPC. No matter if you're a beginner or a seasoned pro, this guide has got your back.
Picture this: you’ve got a Raspberry Pi sitting on your desk, waiting to be unleashed. But where do you start? How do you connect it to the cloud? And what’s all the fuss about VPC anyway? Fear not, my friend, because we’re here to break it down for you. In this Raspberry Pi VPC IoT tutorial, we’ll cover everything you need to know to get started, from setting up your hardware to deploying cloud-based applications.
Before we dive deep into the nitty-gritty, let me assure you that this isn’t just another boring tech article. We’ll sprinkle in some humor, real-world examples, and practical tips to make your learning experience smooth and enjoyable. So, grab your favorite beverage, sit back, and let’s embark on this IoT adventure together.
Read also:Unveiling Mydesinetcom Your Ultimate Destination For Digital Solutions
What is Raspberry Pi VPC IoT Anyway?
Alright, let’s start with the basics. Raspberry Pi is like the Swiss Army knife of the tech world. It’s a tiny, affordable computer that can do everything from running media centers to controlling robots. When we talk about Raspberry Pi VPC IoT, we’re referring to using this little powerhouse to connect to the cloud via a Virtual Private Cloud (VPC).
VPC, in simple terms, is like a secure bubble in the cloud where you can host your applications and services. By combining Raspberry Pi with VPC, you create a secure and scalable environment for your IoT projects. This setup allows you to collect data from sensors, process it in the cloud, and even control devices remotely. Cool, huh?
Why Should You Care About Raspberry Pi VPC IoT?
Here’s the deal: IoT is everywhere. From smart thermostats to industrial automation, connected devices are transforming the way we live and work. By mastering Raspberry Pi VPC IoT, you open up endless possibilities. Whether you want to monitor your home’s energy consumption, build a weather station, or even create a drone fleet, this setup is your ticket to success.
- Enhanced security with VPC
- Scalability for large-scale projects
- Cost-effective solution for IoT
- Easy integration with cloud services
Trust me, once you see how powerful this combination is, you’ll wonder why you didn’t try it sooner.
Getting Started: Setting Up Your Raspberry Pi
Before we jump into the VPC part, let’s make sure your Raspberry Pi is ready to roll. Here’s a quick checklist to get you started:
What You’ll Need
- Raspberry Pi (any model will do)
- MicroSD card with Raspberry Pi OS installed
- Power supply
- Network connection (Wi-Fi or Ethernet)
- SSH client (optional, if you prefer headless setup)
Once you’ve gathered all the essentials, it’s time to set up your Pi. Follow these steps:
Read also:Watch Your Favorite Movies For Free With Vegamovies Ndash The Ultimate Guide
- Insert the microSD card into your Raspberry Pi.
- Connect the power supply to turn it on.
- Set up Wi-Fi or Ethernet connection.
- Update your Raspberry Pi OS using the terminal:
sudo apt update && sudo apt upgrade.
And just like that, your Raspberry Pi is ready for the next step. Easy peasy, right?
Understanding VPC and Its Role in IoT
Now that your Raspberry Pi is up and running, let’s talk about VPC. Think of VPC as your private playground in the cloud. It’s a secure network where you can host your IoT applications, store data, and even run analytics. The best part? You have full control over who gets access.
Why VPC for IoT?
Security is a big deal when it comes to IoT. Without proper safeguards, your data could be vulnerable to hackers. VPC provides a secure environment by isolating your resources from the public internet. Plus, it offers features like:
- Private subnets for sensitive data
- Firewall rules to control traffic
- Integration with cloud services like AWS, Google Cloud, or Azure
By using VPC, you ensure that your IoT setup is not only secure but also scalable. As your project grows, you can easily add more resources without compromising performance.
Connecting Raspberry Pi to VPC
Alright, let’s get our hands dirty. Connecting your Raspberry Pi to VPC involves a few key steps. Don’t worry; we’ll walk you through each one.
Step 1: Choose Your Cloud Provider
First things first, you’ll need to select a cloud provider. Some popular options include:
- AWS (Amazon Web Services)
- Google Cloud Platform
- Azure
For this tutorial, we’ll focus on AWS since it’s widely used and beginner-friendly. Sign up for an AWS account if you haven’t already.
Step 2: Create a VPC
Once you’re logged into AWS, follow these steps to create a VPC:
- Go to the VPC dashboard.
- Click on “Create VPC.”
- Set a name for your VPC and define the IP range (e.g., 10.0.0.0/16).
- Configure subnets and security groups as needed.
With your VPC ready, it’s time to connect your Raspberry Pi.
Step 3: Configure SSH Access
To securely connect your Raspberry Pi to VPC, you’ll need to set up SSH access. Here’s how:
- Generate an SSH key pair in AWS.
- Download the private key and store it securely.
- Set up an SSH client on your Raspberry Pi.
- Use the private key to connect to your VPC instance.
Voilà! Your Raspberry Pi is now connected to VPC. Time to start building your IoT masterpiece.
Building Your First IoT Project
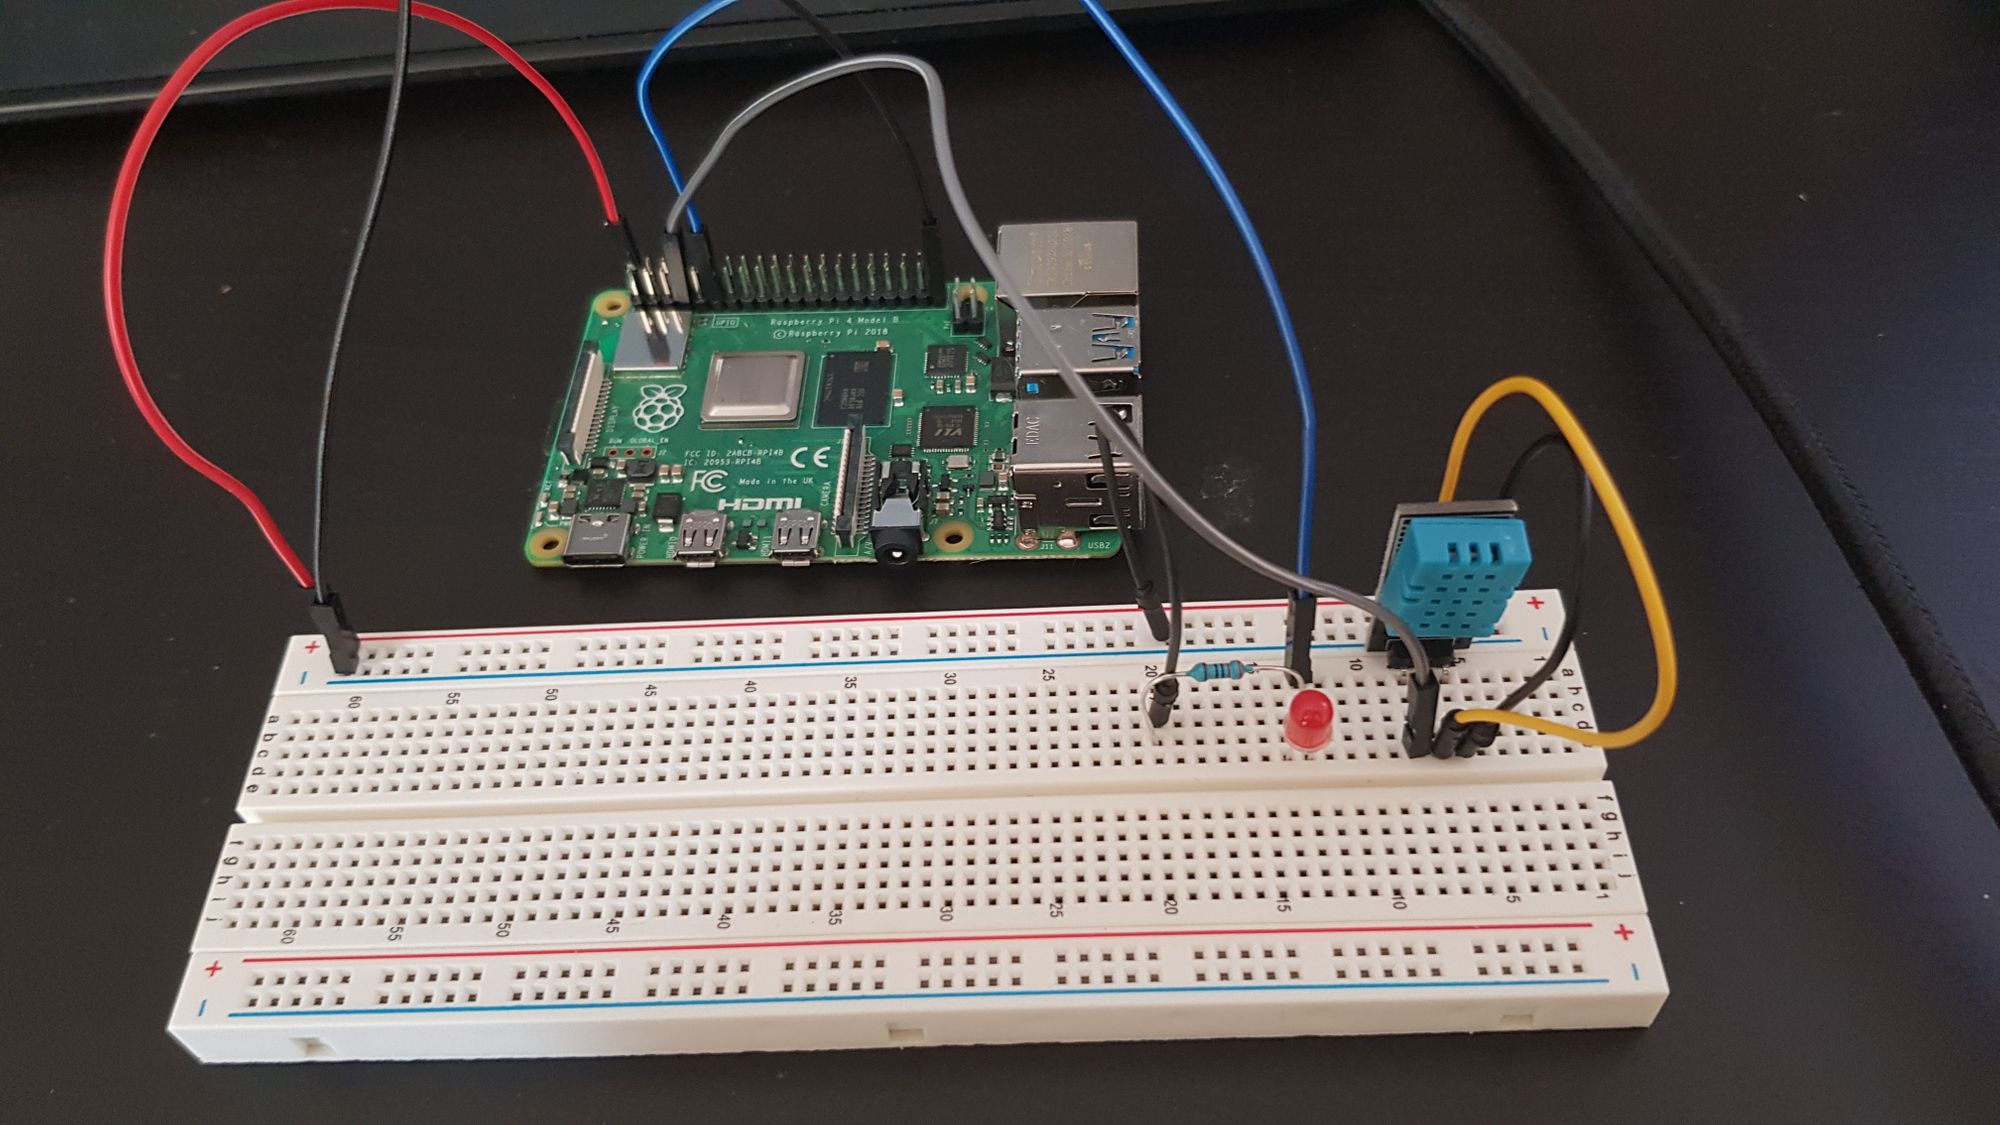
Now that your Raspberry Pi is connected to VPC, let’s build something awesome. For this tutorial, we’ll create a simple IoT project: a temperature and humidity monitor.
Hardware Requirements
- Raspberry Pi
- DHT22 sensor
- Breadboard and jumper wires
Connect the DHT22 sensor to your Raspberry Pi using the breadboard. Make sure to follow the correct pin configuration to avoid any mishaps.
Software Setup
Next, install the necessary software on your Raspberry Pi:
- Install the Adafruit DHT library:
pip install Adafruit_DHT. - Write a Python script to read data from the sensor and send it to your VPC instance.
Here’s a sample Python code to get you started:
import Adafruit_DHTsensor = Adafruit_DHT.DHT22pin = 4humidity, temperature = Adafruit_DHT.read_retry(sensor, pin)print("Temperature: {:.1f} C".format(temperature))print("Humidity: {:.1f} %".format(humidity))
Once you’ve tested the script locally, you can modify it to send data to your VPC instance using APIs or databases.
Scaling Your IoT Project
As your IoT project grows, you’ll need to scale your setup. Here’s how:
Database Integration
Store your sensor data in a cloud database like Amazon RDS or Google Cloud SQL. This allows you to analyze trends and generate reports.
Automation with Lambda
Use AWS Lambda to automate tasks like sending notifications or triggering actions based on sensor data.
Monitoring with CloudWatch
Keep an eye on your IoT devices with AWS CloudWatch. Set up alarms to notify you of any issues or anomalies.
Best Practices for Raspberry Pi VPC IoT
To ensure your Raspberry Pi VPC IoT setup runs smoothly, follow these best practices:
- Regularly update your Raspberry Pi OS and software.
- Secure your SSH access with strong passwords and key-based authentication.
- Monitor your VPC resources to avoid unexpected costs.
- Document your setup for future reference.
By adhering to these practices, you’ll minimize risks and maximize the potential of your IoT projects.
Troubleshooting Common Issues
Even the best-laid plans can hit a snag. Here are some common issues you might encounter and how to fix them:
- SSH connection fails: Double-check your key pair and ensure your security group allows SSH traffic.
- Sensor not working: Verify your wiring and ensure the sensor is properly connected.
- Data not updating: Check your API endpoints and database connections.
Remember, persistence is key. Don’t give up if things don’t work the first time. Debugging is half the fun!
Conclusion
There you have it, folks—a comprehensive Raspberry Pi VPC IoT tutorial to kickstart your cloud-based projects. From setting up your Raspberry Pi to connecting it to VPC and building your first IoT project, we’ve covered all the essentials. But the journey doesn’t end here.
Now it’s your turn to take what you’ve learned and apply it to your own projects. Whether you’re building a smart home system, monitoring environmental data, or creating something entirely new, the possibilities are endless. So, what are you waiting for? Get out there and start tinkering!
Oh, and don’t forget to share your experiences, ask questions, or suggest topics for future tutorials in the comments below. Happy coding, and see you in the next one!
Table of Contents
- What is Raspberry Pi VPC IoT Anyway?
- Getting Started: Setting Up Your Raspberry Pi
- Understanding VPC and Its Role in IoT
- Connecting Raspberry Pi to VPC
- Building Your First IoT Project
- Scaling Your IoT Project
- Best Practices for Raspberry Pi VPC IoT
- Troubleshooting Common Issues
- Conclusion


